It is not the heaviest of heavies. Its slightly smaller and less expensive, both in points and currency, than a Cobra. But it still packs a mean punch, with a choice of either a two-shot Destroyer cannon or an apocalyptic template D-weapon. It only has two structure points, but its Titan holo-fields give it a decent Invulnerable or Cover Save each time it moves. But what's it like tto build?
Turns out, pretty easy. Its a nice straightforward kit with a minimum of parts, most of which are easily removed from their sprues. There's lots of big flat surfaces to glue together as well, so you end up with a fairly solid little tank. Apart from the antennae, but we'll get to them later. Also note this is the Pulsar version of the Lynx. Construction for the Sonic Lance version might vary, but likely only in the shape of a couple of the components.
So it looks like there's a lot of stuff in the bag the Lynx comes in. And clearly some of the parts are likely to be warped. Boiled water does the job of straightening out things like the cannon barrel and wing tips, so no big deal.
You're probably going to start with the main fuselage. Its three large chunks of resin and they all slot together nicely.
I recommend adding the weapon power plant and the engines next, before the control flaps/jets on either side. This is because when you are applying pressure to the engine parts, waiting for the glue to dry, you will likely be tempted to brace your fingers against the side of the tank, making pulling those flaps off again if the glue there isn't perfectly dry.
When you glue the engines on though, the two long ones go in the inside positions on each side, the shorter ones on the outside. There are tabs at the base of the engine components to guide their alignment, though you may need to trim them a little for a smooth fit. And yes, I did cut my thumb open while making this kit ><
Here's the control surfaces at the left side of the tank. You can see the shorter piece goes to the front, the longer at the rear. Mine were a little warped, something I didn't notice until I had glued them on, so check yours and heat-treat if needed.
The main weapon comes in two parts. A power plant type thingy for the back end. Again, there is a tab that may need trimming.
And the main pulsar barrel at the front. Another tab to make sure it is aligned properly.
The kit also comes with four warp vanes/antennae. There are two long and two short. I suppose you could put them pretty much wherever you want and there's probably some scope for artistic interpretation there. I prefer to just stick mine on like the ones on the Forge World site though, so its the long ones in the middle and the short ones on the outside surfaces.
Make no mistake though; these vanes are tied for worst part of this whole kit. As they are resin, they are almost guaranteed to be warped when you get them and furthermore brittle and incredibly prone to snapping. I mean really prone to snap. I've definitely snapped three of them with only light pressure. Its going to make transporting this thing a pain in the bum, :( So be very very careful with them, or use spare plastic ones if you have them.
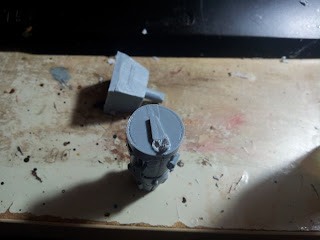
The only part of the kit that rivals the vanes in the Bad Design awards has to be the stand. For this large chunk of expensive resin you get: a standard 40mm flying base. There is a hole drilled in the base of the tank, but if you insert the stand into it the tank does not balance and just lists to one side. Maybe I got unlucky and got a Lynx with an over-drilled hole, but I doubt it. I have instead magnetised the base and the stand so its now nice and solidly attached.
Thats it for the construction. I forgot to take a picture of the secondary weapon mount, but its fairly obvious where it attaches below the cockpit. You only get the shuriken cannon option in the kit though, so, if you're playing a really strict game of Apocalypse, where WYSIWYG is observed, you might want to mod this bit before deploying.
Next: the painted model and battle report.


No comments:
Post a Comment